
For product strategy, downplaying the importance of visuals is a no-go: after all, how would you get customers to buy if they didn’t know what to expect from your products? According to HubSpot, 32% of marketers surveyed in one report by Social Media Examiner say that visual marketing was the most important type of content for their business. B2C marketers understand: 11% more of them said visual content was the most important kind out today compared to their B2B counterparts.
Luckily, investing in a high-end camera is no longer a hard necessity for getting appealing product shots. Smartphone cameras have come a long way, with the latest models boasting higher megapixel counts than ever before and an array of built-in features. Here are three tips on using this everyday companion to take great product shots—with just a little ingenuity and the right props.
Create Your Own “Pre-Set”

Get to know your phone camera. Many of us use this little app every day but don’t bother exploring its settings and modes. To start, take some test shots of a single small or medium-sized object using different combinations of adjustments available in the default camera app. Having the object placed on a table works as a simple setup—with this you can add or subtract elements in the background to see how each camera setting works when more than one is in the frame. A few to particularly consider:
- Mode – You can stick with the Auto or Default feature, but you could also experiment with Macro or Portrait, which are designed to take more detailed close-ups.
- Grid Lines – You can find the grid-lines option in the settings menu of any default camera app. This overlays a 3×3 grid onto the screen not visible in the final product so that you have a guide for composing shots.
- Focus – You can do this automatically by pressing any spot on the screen for the camera to focus there. However, most phones also have a mode dedicated to altering depth of field in either their mode or settings menu.
Downloading a separate, reliable photo editing app (Instasize is one with both free and premium options) will also enable you to place color filters, adjust the more minute details of your image, add text overlays, and even make collages. Be sure to check brightness, white balance, hue, tone, shadows, highlights, and more.

Find your favorite combinations, note them down somewhere easily accessible, and stick with them. Don’t forget that you want to showcase a product, meaning you have the responsibility to also make it look accurate to real life! Using a pre-set is also useful because you want resulting images to look consistent. Having each product obviously processed a different way is a sign that the images are unpolished.

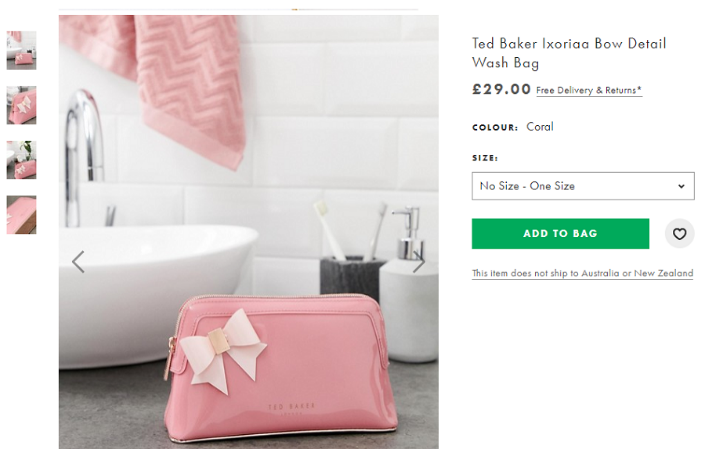
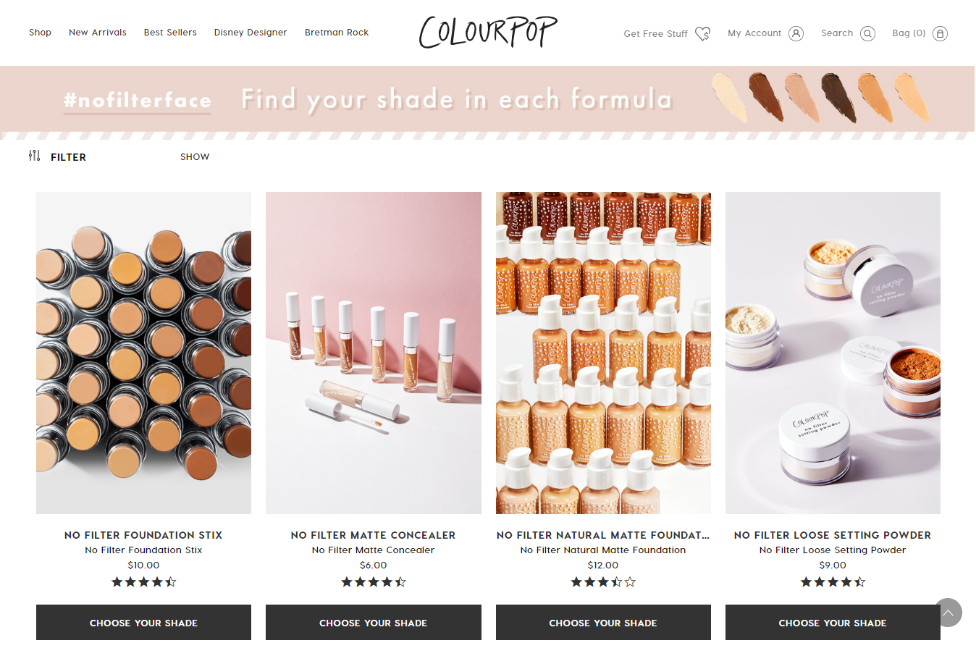
Some ecommerce platforms like Amazon require you to present your products on a plain white background, which are usually achieved in a home set up by using a piece of paper arranged on a chair to create a sweep. White backgrounds are good since they put all the focus on your product, but if you have no restrictions try injecting a pop of similar or complementary colors into the background instead, to make the image more aesthetically pleasing when put in context. For example, in these images from big ecommerce brand ASOS, these makeup and wash bags are not only accented by being placed in the locations they’re most likely to be kept—at a vanity or in a washroom—but by having objects the same color scheme as them spice up the otherwise neutral-colored backgrounds.
Don’t shy away from unconventional colors either! If it adds vibrancy to your product, try creating sweeps of different colors, having non-neutral backgrounds, and adding patterns.
ShootProducts inCollections
Do you have items that come in a set? Create collections or lookbooks by grouping items in the same range together, photographing them simultaneously under a main theme. They don’t need to have the exact same background for it to work, but should stick to core design choices that when looked at as a whole make sense. Even if the products may not necessarily go together, you can always think up new ways to present otherwise unrelated subjects (one tip: go seasonal, like ‘fall picks’ or ‘perfect Christmas gifts’). This cohesion is attractive and can urge users to look through multiple products. Another tip for product photography this way: think about your specific target audience when choosing which products to shoot together into a collection.
There are other ways to improve product photography when using a smartphone, such as using lightboxes or investing in lenses, but these tips can help you with minimal expenses on your part. Find what works for you, continue experimenting, and seek inspiration!


